


Gear and equipment
-
Rentals are available! If you don't want to travel with photography equipment for photographing the northern lights (like a tripod) or need backup gear (lenses) you can find what you need at our local, full-service camera shop.
-
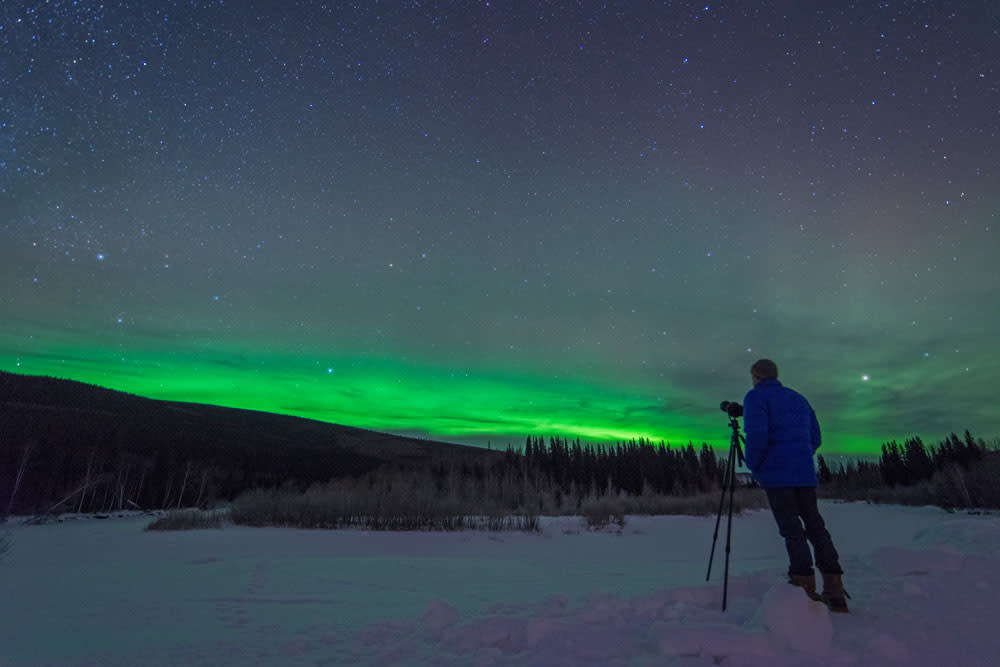
Tripod: Local pros always recommend using a tripod. Whether you are photographing with a large DSLR, compact camera, or smartphone, don’t forgo this important piece of equipment. Why? Northern lights are viewed when it is dark outside, so long exposure is necessary. The camera must remain as still as possible to get a clean, clear photo.
- Camera with manual or long exposure settings: Be sure to use a camera with full manual functions for exposure and focus. Any digital SLR will work; most mirrorless cameras, and some simple digital cameras as well. Keep in mind that image quality will be dramatically reduced with a compact camera.
- Batteries: The cold can really zap your battery life, so bring backups and make sure they are fully charged before embarking on your hunt.
“Keep any battery-operated camera warm. Replace your older batteries in any camera or phone before you come if you expect to stay outdoors any length of time. You can also use chemical hand warmers to keep them warm.” ~ Smokey Don Duncan, Alaska Private Guide Service
- Headlamp with “red light” setting. A few of the pros mentioned this and we feel it is worth passing on. A headlamp that has a red light feature can be very useful for a couple of reasons. One, you can view your camera/phone, car or other gear and not disturb others around you with a bright light. Secondly, the red light minimizes your own eye dilation.
- Zip-lock bags and lens wipes: From pro feedback, it is important to have a few zip-locks on hand and a clean cloth for wiping your lens. The zip-locks can be handy for keeping your batteries together and warm with a hand-warmer and can help you avoid condensation if moving from the cool outside to a warm interior.

Camera settings
-
Set lens to infinity focus (∞): When you set your lens to ∞, the lens will focus on distant subjects (ex. night sky and the aurora). A wide-angle lens is the best choice for photographing the aurora.
-
Set the lens to its widest aperture: Start by picking the smallest number of f-stop. F/2.8, F/3, and F/3.5 are great places to start.
-
Set the ISO: The best thing to do here is to experiment based on the conditions and factors you are experiencing. Start with 1600 ISO and adjust as needed.
- Exposure: Typically, a 6-10 second exposure works best for aurora photography.
“Practice adjusting the settings and get familiar with the camera before the aurora comes out. All too often I’ll see guests go out, try to take photos, then needing to make adjustments. They’ll shine a bright headlamp so they can see what buttons they are pressing, and in the process, they are ruining photos for everyone else around them. Same thing with using a flash. It doesn’t work, and more importantly, it can affect, or even ruin, other people’s photos.” ~ Mok Kumagai, Aurora Borealis Lodge
Smartphone settings
-
Focus: Point your phone at the aurora and tap the screen to lock the camera’s focus.
-
If your smartphone has it: Set to manual mode
-
Turn off flash
-
Exposure and ISO: If possible, adjust the settings for a 2-15 second exposure and ISO to 400-1600
-
Select “night mode” if available on the phone. Night mode will automatically increase your camera’s exposure time.
- Download and try out some apps:
“There are several Apps that can now enable your smartphone to capture photos of the aurora. The picture quality will not be that of expensive cameras, but it can capture the lights and movement fairly well. We recommend guests look at the northern lights photo apps that are available for their type of phone and download the app before they leave for their tour.” ~Kasey, 1st Alaska Tours
How to prepare
-
Stay warm: When the lights come out, you will be outside most of the time, so it is important to be comfortable in the cold with layers of warm clothes. If you don’t want to buy or travel with winter gear, it is possible to rent locally. Avoid wearing cotton and instead opt for synthetic or wool garments. Wool is very warm and moisture wicking, while cotton absorbs moisture and loses all insulation when wet. For more information on layering, check out our video on how to dress for winter.
-
Hand and foot warmers are easy to find in Fairbanks at local sporting goods and grocery stores. They are so handy and really do make a difference in keeping you warm!
-
Book a tour: Most people find comfort in going with an aurora viewing tour for at least one night to get their bearings and to learn from a local guide. We recommend this as well. Aurora guides give excellent tips for viewing, photography and hints about where to go locally if you plan to chase the aurora on your own.
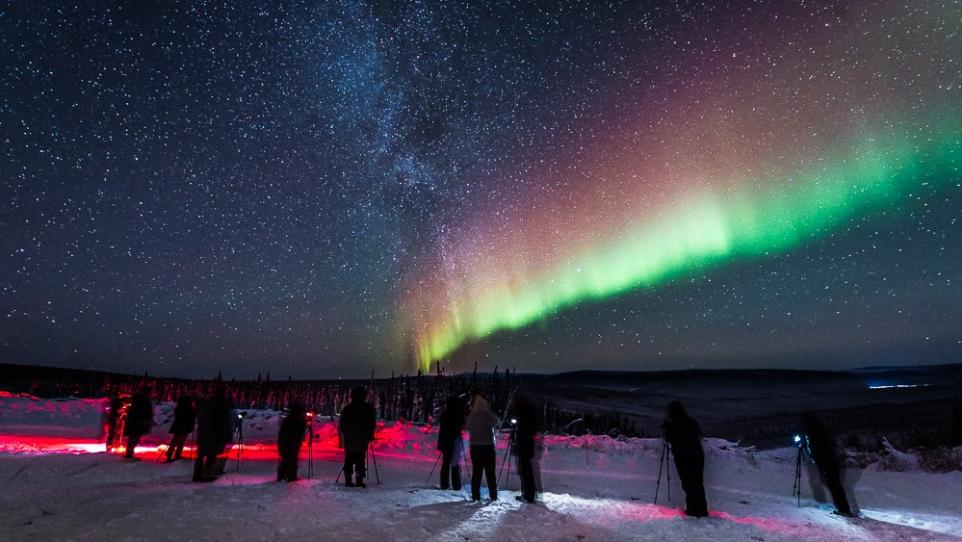
- Location, Location, Location: Map where you are going and give yourself plenty of time to get there. You’ll want to be away from artificial lights and have a good view of the clear night sky.
"Before the northern lights come out, you want to be in a good location to photograph the lights. They do not always last long so being prepared and ready is very important.” ~Megan Daniels, Alaska Aurora Adventures
Aurora Viewing Map & Guide
Use the Aurora Viewing Map & Guide to plan your aurora viewing adventure in the Fairbanks area. In addition to an easy-to-use map detailing northern light vantage points, you'll find science information, pro tips for aurora chasing and FAQs.
While you're in Fairbanks, a printed copy can be picked up at the Morris Thompson Cultural and Visitors Center, local hotels or through tour operators.
Advice from the experts
-
“Aurora chasing is like fishing. You can put yourself in a good spot at a good time of the day and this will increase your chances of catching a fish, but ultimately it is up to the fish to go after your hook. You can put yourself as close to the Auroral Oval as possible. You can put yourself there at the best time of the night (2 hours on either side of solar midnight - which is not the same as chronological midnight). But whether you see the aurora or not is ultimately going to be governed by factors beyond your control (solar activity, weather).” ~Robert Weeden, Northern Alaska Tour Co.
-
“One of the most common problems of successful aurora viewing opportunities is the weather, so remember that the weather forecast is far more important than the aurora forecast. It takes clear skies first, and then even on a low Kp prediction night, Fairbanks is far enough north to still have a chance of seeing the lights. Ultimately though, if you aren’t out looking you won’t see them, so take every opportunity you can during your stay to see the lights.” ~Megan Daniels, Alaska Aurora Adventures
-
“Always put your lens cap on before bringing the camera inside, or you’ll have condensation all over the lens. Ideally, you want to avoid taking the camera from extreme cold to warm, but the lens cap, and also zip -lock bags will help. “ ~Mok Kumagai, Aurora Borealis Lodge
-
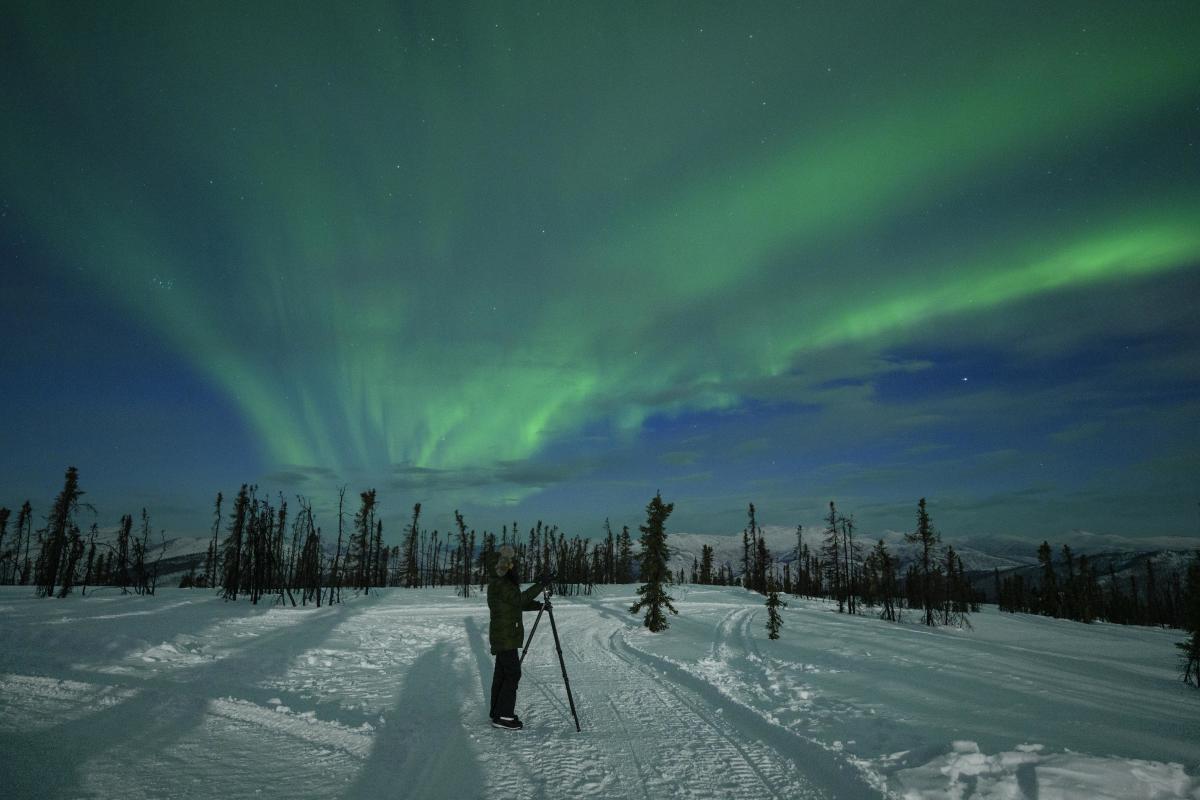
“For most of your northern lights pictures, consider having foreground points of interest to help balance the shots (trees, mountains, buildings, etc.)" ~Gary Karl, Chena Hot Springs Resort
-
“The aurora forecast number does not mean much. If it is clear and dark there is a good chance to see it. The best show I have ever seen was on a night forecast at a two and I have spent several nights sitting on top of Charlie Dome with the forecast being five or six and saw nothing at all." ~Nate Beroff, Chena Hot Springs Resort
-
“Even if you are adventurous and have your own rental car here - book your first night with a professional photographer to learn how to adjust and handle your camera and to learn about aurora photography. Then you are not wasting your precious few nights with figuring this out by yourself. Later on, you can drive out by yourself or book a normal aurora tour with one of the many awesome tour operators we have here in Fairbanks." ~Frank Stelges, Aurora Bear LLC
Fairbanks and the surrounding areas offer the best of the best aurora viewing, and world class photography opportunities. The most important thing is to come prepared, experiment with your settings before heading out and consider booking an aurora viewing tour to get the lay of the land. Most of all, have fun and stay warm out there!
For more information:
-
Explore Fairbanks real-time Aurora Tracker, 3-day forecast and information
-
National Geographic Magazine: “Fairbanks is the best place in the U.S. to take in the northern lights."
-
CNN: “The city of Fairbanks, in Alaska, is often cited as the best place to see the Northern Lights in the United States”
-
Travel + Leisure and Smithsonian Magazine both call Fairbanks the best place to view the northern lights in the U.S.
- Best places to view the Northern Lights close to Fairbanks
